Levels and Levelling in Surveying: A Comprehensive Guide
Levelling is a fundamental aspect of surveying, critical for ensuring that construction projects adhere to design specifications and are built on a stable, accurate foundation. The objective of any levelling instrument is to direct the line of sight in a horizontal direction. This guide will explore various levelling instruments, the importance of axis error correction, crosshair alignment and balance, and procedures like the peg check. We will draw on expert opinions and practices from surveying companies worldwide to provide a detailed, search engine-optimized article. At the bottom of this post is a new tool that I am developing to help our members keep track of their elevations on level loops. Also, if you have not yet followed the new Continuing Education hub, you can do that here. Let's begin.
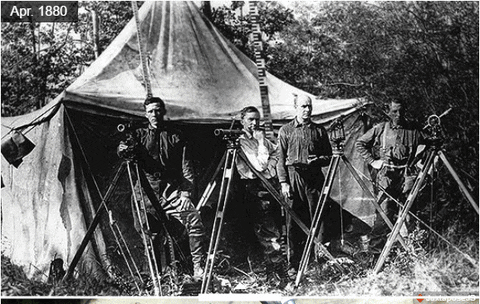
See Also: Photos of Levelling. and Videos of Levelling
Understanding Levelling Instruments
Levelling instruments are used to establish or verify points in the same horizontal plane. There are various types of levelling instruments, each with unique features to accomplish this goal.
The Invention of the Leveling Rod
The W. Gurley Leveling Rod is an important invention in the history of land surveying equipment, patented in the United States. Here's a detailed overview of the patent:
W. Gurley Leveling Rod Patent Overview
Patent Number: US 7,673
Filing Date: February 22, 1851
Issue Date: October 7, 1851
Inventor: W. & L.E. Gurley
Assignee: W. & L.E. Gurley
Title: Improvement in Leveling-Rods
Classification: G01C7/02 (Surveying instruments; Measuring distances or angles)
Description
The W. Gurley Leveling Rod, also known as a leveling staff, is a precision instrument used in surveying and construction to measure the difference in elevation between two points. This invention provided an improvement over existing leveling rods in terms of design, accuracy, and ease of use.
Key Features
-
Telescopic Design:
- The leveling rod featured a telescopic design, allowing it to be extended or collapsed as needed. This design made it more portable and versatile for use in different surveying scenarios.
-
Measurement Graduations:
- The rod included precise graduations marked along its length. These graduations were typically in feet or meters, enabling surveyors to read measurements accurately.
-
Target or Vernier:
- A sliding target or vernier was attached to the rod, which could be adjusted to the desired height. This feature allowed surveyors to read measurements more easily by aligning the target with the line of sight of a leveling instrument.
-
Durable Materials:
- The leveling rod was constructed from durable materials such as wood or metal, ensuring that it could withstand the rigors of fieldwork and provide long-lasting performance.
-
Compact and Lightweight:
- Despite its telescopic design, the leveling rod was compact and lightweight, making it easy to transport and handle during surveys.
Advantages
-
Enhanced Accuracy:
- The W. Gurley Leveling Rod improved the accuracy of elevation measurements, which was crucial for tasks such as topographic mapping, construction leveling, and land surveying.
-
Portability:
- The telescopic design allowed surveyors to carry and use the rod in various terrains and conditions, enhancing its practicality.
-
Ease of Use:
- The clear graduations and adjustable target made it easier for surveyors to obtain precise measurements, reducing the chances of errors.
Historical Significance
W. & L.E. Gurley, founded by William Gurley and Lewis E. Gurley, was a prominent manufacturer of surveying instruments in the 19th century. The company played a significant role in advancing the field of surveying by introducing innovative tools and instruments.
The W. Gurley Leveling Rod patent is a testament to the company's commitment to improving surveying technology. The invention of this leveling rod marked a significant step forward in making surveying more accurate and efficient, laying the groundwork for modern surveying practices.
Modern Usage
While technological advancements have led to the development of electronic and digital leveling instruments, the fundamental principles of the W. Gurley Leveling Rod remain relevant. Traditional leveling rods continue to be used in many parts of the world for tasks that require manual measurement.
Automatic Levels
Automatic levels are the most prevalent type used in modern surveying. They feature an internal pendulum compensator that adjusts the line of sight each time the instrument is moved, maintaining a constant angle with the gravity vector. This feature minimizes the need for precise instrument setup, making the process more efficient and reducing the likelihood of human error.
Dumpy Levels
The dumpy level is a traditional instrument in which the line of sight is set at a right angle to the vertical axis. Properly adjusted level vials and meticulous attention to instrument setup are crucial to ensure accuracy. According to Survipos Surveying, a leading surveying company in Australia, "Dumpy levels are highly reliable for tasks requiring stable and precise measurements, despite their somewhat more complex setup."
Tilting Levels
Tilting levels, though less common, share a similar advantage to automatic levels. The line of sight is manually levelled with a tube vial each time the instrument is moved. This means the vertical axis only needs to be roughly plumb, simplifying the setup process while maintaining accuracy.
The Importance of Axis Error
Axis error refers to the deviation of the vertical axis from true plumb. It is crucial to minimize axis error to maintain the accuracy of levelling instruments:
Impact on Automatic Levels
Automatic levels rely on an internal pendulum compensator, which adjusts the line of sight relative to the gravity vector rather than the vertical axis. This compensator requires the axis to be approximately plumb to function correctly. Leica Geosystems, a global leader in surveying solutions, notes, "Even a slight deviation in the vertical axis can affect the pendulum's ability to maintain a true horizontal sight line."
Impact on Dumpy and Tilting Levels
For dumpy and tilting levels, the line of sight is directly set at a right angle to the vertical axis. Therefore, precise alignment and careful levelling of the instrument are critical. Topcon Positioning, a surveying equipment manufacturer, states, "Ensuring the vertical axis is accurately plumb is fundamental for achieving reliable measurements with dumpy and tilting levels."
Crosshair Alignment and Balance
The alignment of the crosshair in a levelling instrument significantly impacts measurement accuracy. While the horizontal position of the crosshair is less critical, vertical misalignment can cause the line of sight to dip or rise, leading to errors.
Importance of Vertical Alignment
Vertical misalignment causes the line of sight to deviate into a cone shape rather than a plane. Assuming a flat Earth, the error in any given sight increases with the distance of the sight. According to Trimble Inc., a leader in geospatial technology, "Regular calibration and adjustment of the crosshair are essential to ensure precise vertical alignment and accurate measurements."
Balancing Shots
All instruments have inherent errors. To mitigate these, surveyors use the method of balancing shots. In a levelling circuit without inverted rod shots, backsight readings are added, and foresights are subtracted. By ensuring equal backsight and foresight distances, errors can be canceled out. This process is crucial on uneven terrain, where unbalanced shots can quickly accumulate significant errors.
The Peg Check
The peg check is a procedure used to detect and correct vertical errors in the alignment of the crosshair. It involves two variations: the center-end method and the end-end method. Both methods are designed to ensure the accuracy of the levelling instrument.
Center-End Method
The center-end peg check involves setting two pegs (A and B) about 300 feet apart and placing the instrument midway between them. By taking balanced shots, the initial elevation difference is established. The instrument is then moved close to peg B to close the loop back to peg A, revealing any vertical error.
- Procedure: Start by backsighting peg A and foresighting peg B with the instrument centered between them. Move the instrument close to peg B, backsight peg B, and foresight peg A to close the loop. Any discrepancy in the measured elevation of peg A indicates a vertical error.
- Adjustment: If the error is out of tolerance, adjust the crosshair up or down by the amount of the closure error, multiplied by the ratio of the foresight distance to the imbalance distance.
End-End Method
The end-end peg check involves creating a greater imbalance by placing the instrument close to each peg in turn and taking readings. This method allows for the detection of errors using shorter sights.
- Procedure: Set pegs about 200 feet apart. Place the instrument close to peg A and take a short backsight on A and a long foresight on B. Move the instrument close to peg B, backsight B, and foresight A.
- Adjustment: The adjustment formula is similar to the center-end method but accounts for the doubled distance between the pegs.
Expert Insights from Surveying Companies Worldwide
1. Stantec (Canada)
Stantec, a global design and consulting firm based in Canada, emphasizes the importance of levelling accuracy in large-scale projects. "Inaccurate levelling can lead to significant issues in construction, particularly in infrastructure projects where precision is paramount," says John Anderson, Senior Surveyor at Stantec. "Regular calibration and peg checks are essential practices to maintain the integrity of our measurements."
2. Arup (United Kingdom)
Arup, a multinational professional services firm headquartered in London, highlights the role of advanced technology in levelling. "The use of robotic total stations and digital levels has revolutionized the accuracy and efficiency of our surveys," notes Emma Clark, Principal Engineer at Arup. "These tools allow for real-time adjustments and minimize human error, ensuring our projects meet stringent accuracy requirements."
3. Fugro (Netherlands)
Fugro, a Dutch multinational specializing in geotechnical and survey services, underscores the importance of precise levelling in marine and coastal projects. "The dynamic environment of marine surveying demands highly accurate levelling instruments and rigorous procedures," explains Peter van den Berg, Chief Surveyor at Fugro. "Our commitment to precision ensures the safety and stability of our offshore structures."
4. Surbana Jurong (Singapore)
Surbana Jurong, a global urban, infrastructure, and managed services consulting firm based in Singapore, focuses on the importance of levelling in urban development. "In densely populated areas, accurate levelling is critical to optimize space and ensure structural integrity," says Lim Wei Ming, Senior Surveyor at Surbana Jurong. "We rely on a combination of traditional and modern levelling techniques to achieve the highest standards."
5. AECOM (United States)
AECOM, a multinational engineering firm headquartered in Los Angeles, emphasizes the significance of training and expertise in levelling. "The precision of our surveys is a direct result of our team's expertise and continuous training," states Michael Roberts, Lead Surveyor at AECOM. "By staying updated with the latest technology and best practices, we ensure our levelling processes are second to none."
Best Practices in Levelling
Achieving accurate levelling requires adherence to best practices, including the use of advanced equipment, thorough plan reviews, clear communication, regular inspections, and detailed documentation.
Advanced Equipment
Modern surveying instruments such as Total Stations, GPS units, and laser levels significantly enhance accuracy and efficiency. Robotic total stations, for instance, allow for precise measurements even in challenging environments.
Thorough Plan Reviews
Before commencing levelling, surveyors must meticulously review design plans to understand all dimensions, elevations, and specifications. Cross-referencing these plans with site conditions helps identify potential discrepancies early on.
Clear Communication
Effective communication between surveyors, engineers, architects, and construction crews is crucial. Regular meetings and updates ensure that all parties are aligned and aware of any changes or issues that arise.
Regular Inspections
Periodic inspections during the levelling process help verify that all points are accurate and have not been disturbed. This proactive approach helps maintain the integrity of the levelling throughout the project.
Detailed Documentation
Detailed documentation of all levelling activities, including measurements, calculations, and adjustments, is essential. This documentation provides a reference for resolving any disputes or discrepancies that may occur.
Conclusion
Levelling is a cornerstone of surveying, ensuring that construction projects adhere to design specifications and are built on a stable, accurate foundation. By understanding and implementing the principles outlined in this guide, professional land surveyors can enhance their skills and contribute to the successful completion of projects worldwide.
For further reading and detailed resources, visit:
- American Congress on Surveying and Mapping
- National Society of Professional Surveyors
- Stantec
- Arup
- Fugro
- Surbana Jurong
- AECOM
By adhering to best practices, utilizing advanced equipment, and fostering effective communication, surveyors can significantly contribute to the success of construction projects, ensuring accuracy, compliance, and efficiency at every stage.
Elevation Level Loop Tool (click the full screen button top right
How to Use the Elevation Level Loop Checklist
This guide provides step-by-step instructions for land surveyors to use the Elevation Level Loop Checklist. Follow these steps to ensure accurate data collection and efficient workflow during your survey.
Getting Started
-
Open the Checklist Form: Open the Elevation Level Loop Checklist form on your device.
-
Review the Checklist Table: Familiarize yourself with the table structure, which includes the following columns:
- Step
- Checkbox
- Elevation
- Backsight
- Station Number
- Latitude
- Longitude
- Notes
Filling Out the Checklist
-
Complete Each Step:
- Step: The sequential number of the surveying station.
- Checkbox: Mark this checkbox once you have completed the data entry for that step.
- Elevation: Enter the elevation measurement for the station.
- Backsight: Record the backsight measurement.
- Station Number: Input the station number.
- Latitude: Enter the latitude coordinates of the station.
- Longitude: Enter the longitude coordinates of the station.
- Notes: Add any relevant notes or observations about the station.
-
Repeat for Each Station: Ensure that each station's data is accurately entered into the table. Use the provided rows for up to 10 stations.
Adding New Stations
- Add New Station: If you need to add more than 10 stations, click the "Add New Station" button.
- This action will add a new row to the table.
- Fill out the new row with the necessary information as described above.
Calculating Results
- Calculate Results:
- Click the "Calculate Results" button once all necessary data is entered.
- This button will trigger the calculation logic (to be implemented).
- An alert or output will display the calculation results.
Resetting the Form
- Reset Form:
- Click the "Reset Form" button to clear all the entered data and reset the form to its initial state.
- Use this function if you need to start over or correct significant errors.
Exporting Data to Google Sheets
- Export to Google Sheets:
- Click the "Export to Google Sheets" button to export the checklist data to a Google Sheets document.
- This function facilitates data sharing and further analysis.
- An alert will confirm the successful export.
Additional Instructions
- Save Regularly: Save your work frequently to avoid data loss.
- Verify Data: Double-check all entered data for accuracy before calculating results or exporting.
- Consult with Team: Share the exported data with your team for collaborative analysis and verification.
Technical Support
- For Technical Issues: If you encounter any issues with the form, consult your technical support team or refer to the troubleshooting guide.
JavaScript Functions Explanation
The form includes several JavaScript functions to enhance functionality:
- Add New Station: Adds a new row to the table for additional stations.
- Calculate Results: Placeholder for the logic to perform elevation calculations.
- Reset Form: Resets the form to its initial state, clearing all inputs.
- Export to Google Sheets: Placeholder for the logic to export data to Google Sheets.
- This tool will improve over time with your feedback.

Thoughts